
Beads - you will need several small ones and one focal bead. They can all be different but you will need to find a combination that fits.
Plastic caps - for the lamp shade, here I show 2 toothpaste caps and a silver cap off a hair color tube.
Metal Bead caps, I show several here, just under the caps. You will need one for the base of the lamp (shown in next picture)
Needle nose pliers or tweezers - these are used to put beads on pin when you don't want to touch the glue, also to pull the pin fully through the cap.
Glue - Here I use E6000 but any rubber type permanent glue works best. You can use a tacky glue, but it takes longer to set and you may have a difficult time keeping the beads in place, but it is an option.
Heavy duty metal pins. These can have the glass balls on the ends but you will have to break them off, if those are the only ones you can find. These are HEAVY DUTY pins, not regular dress making pins. Quilting pins, etc.. They should be approx. 1 1/2 inches or longer. Smaller is not good, they don't have enough height to look right.

Here is the set up I chose. I pre-fit everything to be sure I like the look before I glue anything.


Next, place a drop of glue above the first bead, or on top of the flat part of the pin, if you are using a shallow base.


Place your metal bead cap on next. This is your lamp base.


I like to dip the pin directly into the glue to get it good and loaded for the next steps.


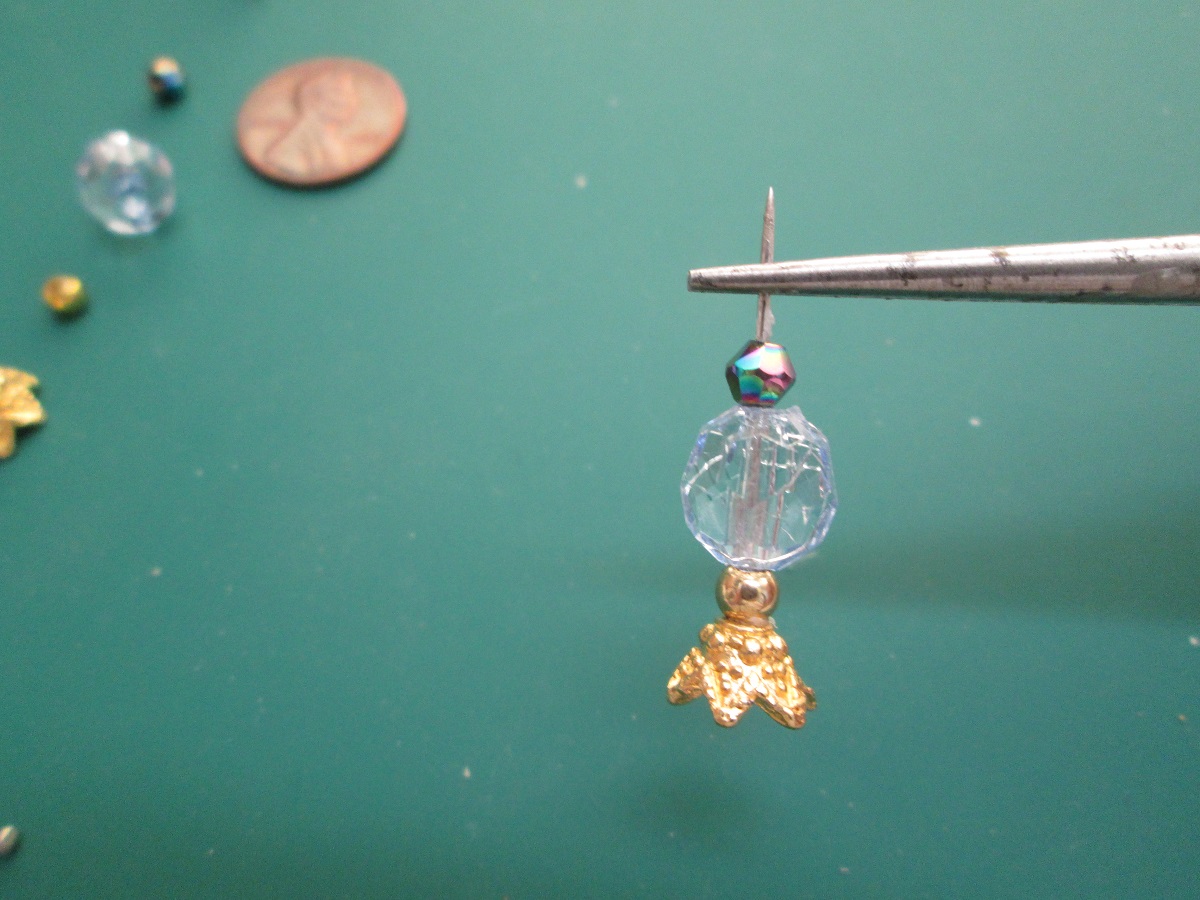

Next you will place all of your beads on, in sequence. You should have approximately 1/4 inch left of pin, at the top. This will go through your cap and you will have some sticking out the top.


Place cap on top and pull through, with pliers or tweezers until you can't pull any more.
Place a dot of glue on the tip of the pin.
In the final step you will put your last bead. This is the finial of your lamp. Here I have used an oblong oval bead, but you can use a round or square bead, any kind you like as long as it covers the sharp end of the pin sufficiently. Just ensure that everything is tight and straight. This is the time to fix anything out of alignment, while your glue is still pliable. Let dry over night.

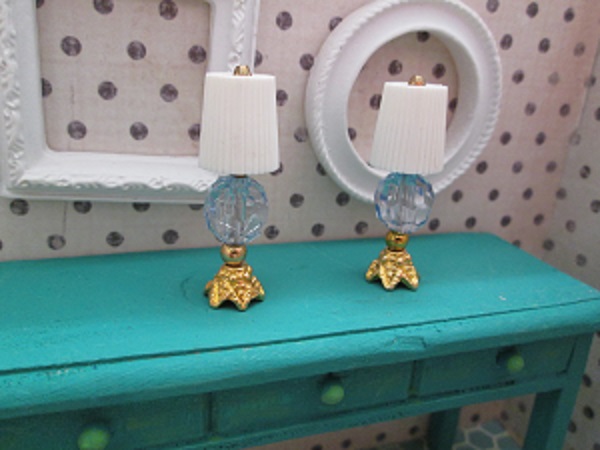
Finished lamp with it's sibling! They are easy-peasy and inexpensive. They look great anywhere too!
Thank you for looking and I would love to hear from you or see pictures if you decide to give it a go.
No comments:
Post a Comment